Category: baking (Page 5 of 7)

Leftover Easter Candy: Marshmallow Tart With Shaved Chocolate

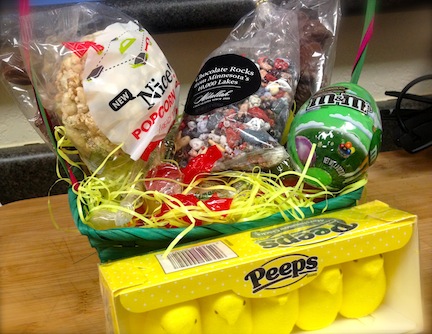
I’m 28 years old and my folks still sent me an Easter basket. It was an unexpected and welcome surprise. I suppose one’s never too old to feel giddy about receiving a brightly colored wicker basket overflowing with chocolates and colorful hard candies from Abdallah’s. When I was growing up, my parents would let me tag along to this candy store in Burnsville, MN. We always bought my mom nicely-wrapped boxes of dark chocolate turtles for special occasions like her birthday and Mother’s Day. They were her favorite.

My folks still sent me Easter baskets in college. One year, I remember my roommates giggling as I unwrapped a chocolate Calvary portraying three crosses on a hill. I was confused, as I thought everyone received chocolate biblical scenes at Easter.

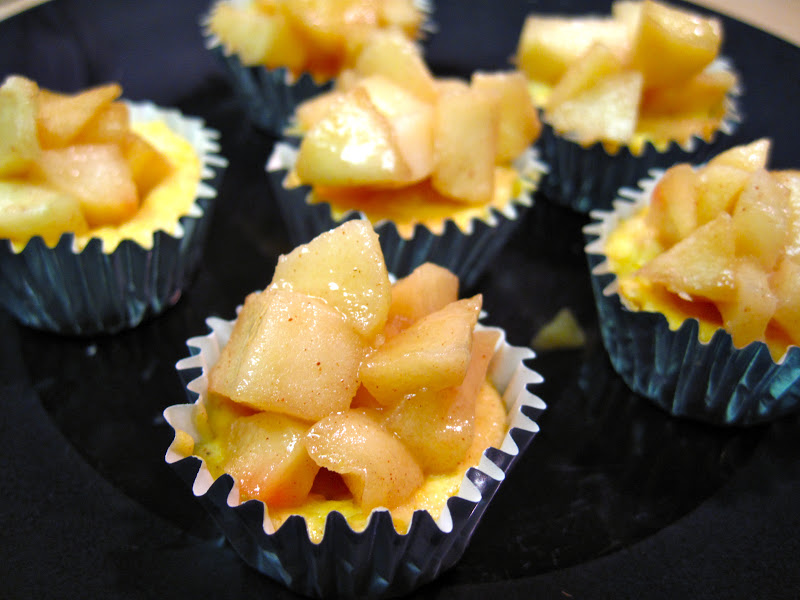
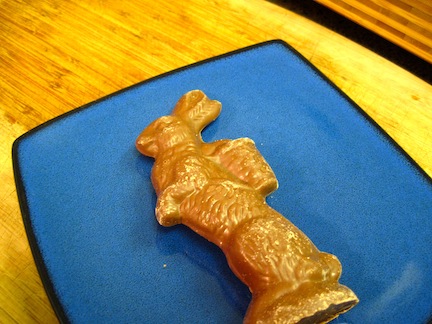
We found two solid milk chocolate bunnies this year. Neither Jake or I eat a lot of candy so I wondered to transform some of my Easter basket into baking projects.

Marshmallow pie came to mind as I thought of my chocolate bunnies. During my first year and a half in Fargo, I worked with a wonderful woman named Becky who told me about a marshmallow pie she always made for her father on his birthday. It’s been months since we’ve spoken of marshmallow pie, but I was still intrigued by the concept.

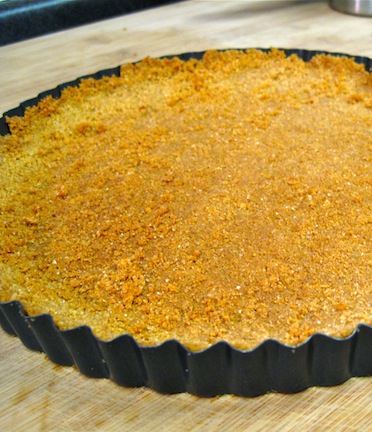
I remembered the basic pie preparation instructions shared and did a little extra internet research so I could create my own pie crust. Graham cracker pie crust recipes seem to be essentially the same, but I preferred this recipe by Saguaro on Food.com because it contained the least amount of sugar. I also adapted the pie filling from the blog Just Everyday Me because it adds real, whipped cream.

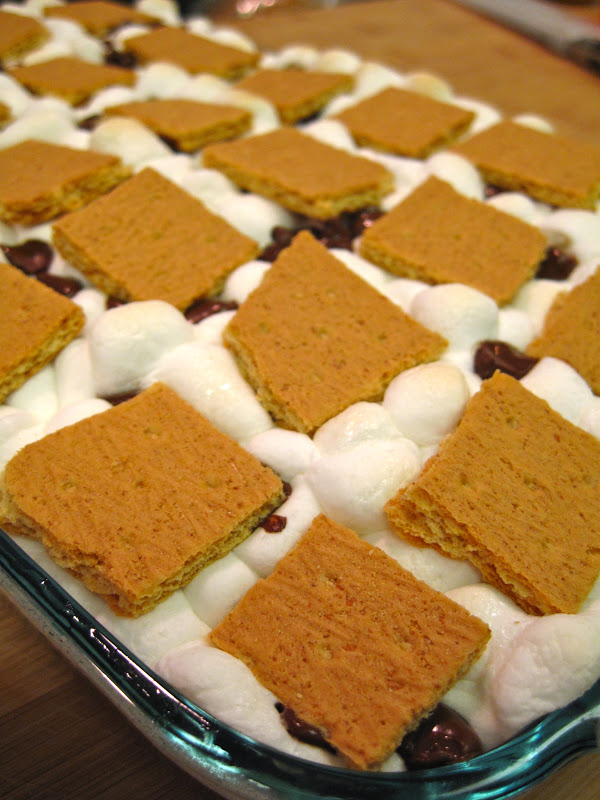
This unusual pie is refreshing. The marshmallow filling is light and fluffy and contrasts with the crunchy, sweet and salty crust. I don’t enjoy heavy and chocolate-laden desserts, but a small piece of this pie with hot coffee makes me feel little closer to heaven, especially on this snowy April weekend.

Marshmallow Tart with Shaved Chocolate Easter Bunny

Graham Cracker Crust

Ingredients:
9 whole graham crackers, crushed or blended into crumbs (1 sleeve)
5 Tablespoons melted butter, salted or unsalted
2 Tablespoons granulated sugar
1 pinch cinnamon
2 pinches of sea salt (about 1/4 teaspoon).

Instructions:

  1. Preheat oven to 350℉.
  2. Crush the graham crackers into crumbs. I used a blender, but you could use a food processor or place the crackers in a bag and crush them with a mallet or you hands.
  3. Place the crumbs into a bowl and combine with melted butter, sugar, cinnamon, and sea salt.
  4. Press the crumbs into the bottom of the pan and up the sides. I used a nonstick tart pan. If your pan is not nonstick, you may want to grease the pan and cover the bottom with parchment paper.
  5. Bake until golden brown. Cool.

Marshmallow Filling

Ingredients:
30 large marshmallows
1/2 cup milk (I used 1%)
1 cup heavy whipping cream
1/2 teaspoon vanilla extract
About 1 cup of grated chocolate. I used one, solid milk chocolate bunny

Instructions:

  1. Heat the marshmallows and milk together in a double boiler and stir until melted and smooth. If you don’t have a double boiler, create one by placing a larger bowl over a smaller saucepan of of simmering water. A double boiler will heat the mixture gently and prevent scorching.
  2. Allow the mixture to cool so that it doesn’t melt the whipped cream and chocolate shavings. To expedite the cooling process, plate the mixture in the freezer and stir occasionally.
  3. Add the vanilla extract to the heavy cream. Whip until it forms stiff peaks. Don’t over-whip or it will separate into butter.
  4. Once the marshmallow mixture is cooled, gently fold in the whipped cream and half of the grated chocolate. Pour into the tart shell. Sprinkle the top with the remaining shaved chocolate and place in the refrigerator to set.

Culinary School Update: Welcome To Baking Lab

It’s been a while since my last culinary school update.

I’m currently in the midst of baking lab. I have grown to love baking so much that it’s hard to imagine I ever thought I’d hate baking lab. The first day was rough, as is usual with most firsts. We had to acclimate to a new set of kitchen tools, baking pans, and equipment. We got assigned to a new cooler and had to chase down a different family of ingredients. Most terrifying, we had to measure.

Whether or not we were supposed to, we got away with a lot of “eyeballing” in salad lab. I followed the recipes closely, for the most part, but eyeballed many measurements. Most of our recipes are written by the cup, while our kitchen is only stocked with pints, quarts, gallons, and scales. Even though I dreaded careful measuring, I have become quite good at it and find comfort in the fact that correct measuring (usually) insures decent baked goods. I’m still tweaking some recipes at home and hope to post them soon. The rest of this semester’s highlights and low lights are summarized in the bullet points below:

  • Repetition takes the anxiety out of most recipes. I love that culinary school is forcing me to make foods I previously avoided out of fear. 
  • Industrial kitchen appliances: I have a track record of breaking things, so I was initially nervous about using kitchen appliances. In my own kitchen, I a minimalist. I haven’t owned a food processor or electronic mixer until recently. Last weekend, I bought my first wooden spoon. Now, I appreciate the convenience of the giant proofer, mixing bread dough with a hook, and whipping cream with a whisk attachment. And I haven’t even broken anything (yet). I still prefer cooking and baking in small batches at home where I measure by the cup and knead bread dough by hand. 
  • Learning tips and tricks from our teachers. The other week, the teacher walked me through my first pie dough and later, my first scones. Sometimes their methods are by the book and sometimes they lead us on detours that differ from what I’ve read about in books or seen on television. My teachers are graduates from the culinary program, have held many roles in the food industry, and returned to teach. I’m not sure why I’m so surprised when their tricks work, but they always do. In fact, it’s probably kind of insulting. We made scones with softer than ice-cold butter in a giant mixer and they were perfectly light and flaky. We also made pie crust in the most unfussy manner and they also turned out light and flaky. It’s nice to know that the baked goods I avoided out of fear can be made without agony or fuss.
  • Diversity of baked goods: The second year students take turns planning the menu, which results in a dizzying array of baked goods and desserts. We’ve made breads such as clover leaf rolls, braided rolls, garlic naan, cheese-stuffed garlic rolls, onion buns, and hot dog buns. The desserts are even more dizzying. Caramel rolls, snickerdoodle brownies, strawberry shortcake, every type of pie, scones with craisens and white chocolate, red velvet cake, churros, and s’mores cheesecake with a bruleed top, just to name a few. For one stretch, I kept finding myself making putzy desserts of graham cracker crusts and multiple layers of fillings made from cream cheese, jello, or pudding mixes. Never felt so Midwestern.
  • I may have a weakness for fried foods but I hate frying: We all had to take turns using the giant donut fryer. I kept expecting oil to splash in my eyes and so my batch of fried dough more closely resembled squiggles and sad O’s than donuts.  
  • I enjoy measuring with a bakers scale. I had no idea these were so expensive. We won’t be purchasing one for home-use any time soon. 
  • Do-over’s: Everyone’s had to start over at least once and I think many of us made the mistake of getting egg yolk in the egg whites. After my first baking do-over, I only crack one egg at a time into a separate bowl, before adding it to the big pile. 
  • Parchment paper rules: After one particularly challenging morning of trying to scrape caramel brownies out of a pan for portioning, I always use parchment paper. Except for angel food cakes. 
  • There are different types of yeast: After baking a goofy batch of cinnamon rolls and buns that inflated to the size of children’s bowling balls, we figured out that I was using an excessive amount of yeast. For example, there’s active dry yeast, instant yeast, and fresh yeast, which are measured differently. Lesson learned. 

One Year In Fargo & Kahlua S’mores Brownies

It’s hard to believe that we’ve lived in Fargo for a year.

On October 6, 2012, Jake and I moved from Bloomington, MN to Fargo, ND, with most of our earthly belongings trailing behind us in a moving truck. We left our tiny one-bedroom apartment in the glass towers next to the airport for our new home three and a half hours west. Besides my college school years spent in Iowa, this was both of our first time living outside of the Twin Cities.

Pre-move, Jake had been offered a promotion within the company while I was finishing my first full-time year of graduate school. I had recently signed-up for the next semester’s classes and been offered my first entry-level job in the field. The offer caught me off guard and his employer needed a quick decision.

Two weeks letter we said yes to the move, and a month and a half later, we were in North Dakota. We spent our first night in Fargo in a hotel while we waited for our moving van to arrive. For dinner, we ate a dinner of take-away chicken wings and boxed wine on the bedspread.

Jake acclimated to his new job responsibilities. I proceeded with the intention of applying to a graduate program in counseling psychology. My applications were complete but I never submitted them because  it didn’t feel 100% authentic. Instead, I decided to continue to write and blog about food and secured my first corporate job in Human Resources.

I spent part of my first year hating Fargo and homesick. Eventually, the loathing turned into annoyance, and then some of what annoyed me became more endearing. The winds still blow strong and cold, and I can’t always find what I want. The traffic moves a little slower and I still do a double take when I see someone else that looks like me. . .

But now I enjoy the more laid-back pace of life. We don’t have the same variety of restaurants to choose from, but we rely on our favorites of which we are genuinely fond. When I first moved to Fargo, the employees at the Somali Business Center soothed my homesick sadness with Somali tea, homemade sambusas, and sweet biscuits. I’ve found home in wine and the perfect cheese plate at the Green Market. After hard days at work in the fleeting summer, Jake and I basked in the sun on the Hodo rooftop patio. We go on dates at Mango’s Mexican Grill on Main Avenue and connect over frosty mugs of beer, fresh salsa, and molcajetes amidst the dusty urban sprawl.

When we don’t want to leave the house, we rely on delivery from Pizza Nico. When we don’t want to go very far, we order take-out from the ever friendly Fortune House. It reminds me of my family’s favorite Chinese take-out in Rosemount, MN. Imperfect, yet perfect in all of the right ways. Nichole’s Fine Pastry stacks up against my favorite Twin Cities bakeries, while Passage To India has become our new Surabhi. It may even be better. I’ll never forget how Jake proposed in the street next to JL Beers and that we celebrated our engagement over seared tuna and gnocchi at Toscana. In celebration of my first birthday in Fargo, we dined with friends at Mezzaluna where I tried to sneak bites of Jake’s M Burger, the best burger I have eaten to date.

I’m having the time of my life exploring the communities surrounding Fargo-Moorhead and between North Dakota and the Twin Cities. And I explore them the best way I know how. By sitting in bars and diners, enjoying the local food. Jake and I used to go on mall dates at the Mall of America dates. Now, we wander the West Acres mall, often with pretzels and coffee in hand, and we always stop at STABO Scandinavian Imports where we look and rarely buy. Recently, I bought a painted lefse flipping stick (amongst their Scandinavian cooking and baking supplies) and a little, red rosemaled mug from which I sip coffee every morning.

Last summer, we spent a weekend relaxing on the shore of Lake Detroit. Later that summer, we drove a little past Lake Detroit, through Paul Bunyan’s country of coniferous forests for the first time. I attended my first outdoor baseball game and watched the RedHawks play on a Halloween theme night where a giant Hershey kiss poured me wine with my chili dog. We wandered the Downtown Street Fair and ate spicy, wood fired pizza from Fireflour’s food truck. I enjoyed my first taste of knoephla soup at the Home Plate Cafe in Fredonia, spent the night at the Rough Riders Hotel tucked amongst Theodore Roosevelt Park, stood on the top of the the Enchanted Highway’s windy hilltops, and explored Little Missouri National Grasslands at sunrise.

We have met friendly and inspiring people who have made our first move much easier, and we continue to meet more each day. We always miss our family and friends from the Twin Cities and we miss our favorite favorite haunts like Lake Nokomis, The Nook, and Bangkok Thai Deli. This has served to make us realize what we had taken for granted and so we are even more grateful than before.

Starting culinary school really solidified my optimistic Fargo state of mind. I found courage in Fargo to resign from my full-time job role and enroll as a full-time culinary student. Against all odds, I was admitted instead of wait listed and am proud to say I just made my first, flaky pie crust. I realized that I never hated Fargo. I just needed to do something I truly loved.

This is not all to say that everything about Fargo is perfect, but I’m having so much fun that I can’t help but to believe we landed in the right place at the right time which I find exciting and lovely.

Except for the trains. I still hate those trains.

Kahlua S’more’s Brownies
Inspired by the s’mores brownies I made in culinary class at Minnesota State Community & Technical College from the school’s cookbook. Kahlua brownie base adapted from the San Luis Obisbo Tribune.


Ingredients:
2 1/2 cups unbleached all-purpose flour, sifted
1/2 tsp baking powder
3/4 tsp salt
1 cup (2 sticks) unsalted butter
2 cups semisweet chocolate chips
1 1/2 cups brown sugar, somewhat packed
2 large eggs
1/2 cup Kahlua

S’mores Topping:
Semi-sweet chocolate chips
Miniature marshmallows
Graham crackers, broken into small squares

Instructions:

  1. Preheat oven to 350 degrees F.
  2. Line a 9X9 baking pan with parchment paper. Then grease the pan.
  3. In a medium-sized bowl, sift together the flour and baking powder and whisk in the salt.
  4. Gently heat the butter and chocolate chips over a double boiler until melted. Set aside to cool. 
  5. In a large bowl, combine the brown sugar, eggs, and Kahlua.  
  6. Once the chocolate mixture cools closer to room temperature, combine with the brown sugar, eggs, and Kahlua.
  7. Gently fold in the dry ingredients, half a a time, until just incorporated.  
  8. Pour into the baking dish, evenly.
  9. Bake for about 40-45 minutes or until a toothpick can be cleanly removed from the center of the brownies. 
  10. Sprinkle with chocolate chips and marshmallows. Return to the oven for a few minutes or until the chocolate is melted and the marshmallows are puffy and starting to turn golden brown.
  11. Top with graham cracker squares and bake for another couple of minutes
  12. The brownies are easier to cut if they are cooled completely. Try popping them in the freezer or on a cold doorstep.  For cleaner cuts, run a knife under hot water and wipe off the debris between cuts. These brownies are incredibly rich so cut into small pieces. 

Baking Sage Bread For Class

This week in culinary school, I gave a speech on sage.

We were all assigned to give short speeches on different herbs and spices.  Sage isn’t necessarily my favorite spice and I haven’t used it frequently in the past.  I am more familiar with sage as a medicinal herb with which my teacher successfully treated women for hot flashes.  I learned that sage is native to the Mediterranean Sea and was used medicinally long before it’s role as a culinary herb.  Garden sage’s scientific name is Salvia officinalis and Salvia is derived from the Latin word Salvare which means “to heal” or “to save.”

When the teacher informed us that whoever brought in treats containing their assigned herb or spice would get extra credit, class got delicious.  I baked sage bread, while others shared chili dip, braided cardamom bread, thyme biscuits, ginger cookies, citrusy cilantro salsa, and nutmeg-flecked English tea cakes.

I’m new to baking yeast breads and adapted a recipe for Navajo Wild Sage Bread, originally published in the book Spirit of the Harvest: North American Indian Cooking, republished on the blog Cooking Books.  Instead of baking the bread in a bowl, I created small loaves.  And because I forgot to buy cottage cheese, I added sour cream, instead. I also added chopped walnut toasted in a little oil with salt and sugar.

The bread turned out to be moist.  I may have pulled them out a little too early in effort to race to class, but the bread tasted pleasing anyway.

A little sage goes a long way.

Ingredients:
1 1/4-ounce package active dry yeast
1/4 cup lukewarm water
1 Tablespoon of honey or sugar
3 cups unbleached flour (I used mostly unbleached bread flour plus a little whole wheat flour)
1 1/2 teaspoons crushed dried sage
Chopped nuts, toasted
3 tablespoon sugar
1 teaspoon salt
1/4 teaspoon baking soda
1 egg
1 cup sour cream
1 tablespoon oil

Instructions:Bloom the yeast by combining it with lukewarm water and sugar.  In about 10 minutes, it should be frothy.  Combine dry ingredients in smaller mixing bowl.  In a large mixing bowl, beat eggs and sour cream until smooth.  Incorporate oil and yeast mixture.  Add the dried sage and nuts. Gradually add the flour mixture until a stiff dough is formed.  I used about 2 1/2 cups of the dry mixture, stopping when the dough became smooth and elastic.

Place dough on a floured surface and knead for about 10 minutes.  Place the dough in a lightly oiled bowl, flipping to make sure all exposed surfaces are covered with the oil.  Let the dough rise until about doubled, which should take about an hour.

Preheat the oven to 375F.  Punch down the dough and knead for 1 minute.

Form the dough into desired shape and bake until the top is golden brown and crusty.  My two small loaves took about 35 minutes.  Remove from pan and cool on a rack. 

*I made my dough the night before and let it rise in the refrigerator, covered.  Before I went to bed, I punched down the dough and re-covered.  The next day, I shaped the dough in the pans and placed on top of the preheating oven, covered, until it rose. Then, I baked the loaves. 

« Older posts Newer posts »

© 2024 Jeni Eats

Theme by Anders NorenUp ↑

Twitter
Visit Us
Follow Me
INSTAGRAM