Tag: Vegetables (Page 1 of 2)

I Signed-Up For A CSA: Two Weeks In

This post is not sponsored. We paid for our own CSA membership. 

I haven’t signed-up for a CSA since we lived in Fargo. I remember getting a lot of corn and potatoes.

By the time I started to think about CSA’s, most seemed to have reached capacity. I didn’t know what this summer would bring and wanted to avoid cash-handling and crowds.

In late April, Untiedt’s Vegetable Farm CSA was still accepting sign-ups. They partner with Kowalski’s, a local grocery store. You can choose any store as a pick-up. If you live near one it’s a convenient option.

Untiedt’s is located in Waverly, MN about an hour from St. Paul. Their farm isn’t strictly organic – they discuss their commitment to sustainable growing practices here.

Continue reading

Chinese Long Beans Are Delicious: A Simple Preparation

Allow me introduce you to my new friend, Chinese long beans.

IMG_6705

If you have ever strolled through Asian markets, you may have noticed this unusual-looking vegetable.

Chinese long beans bring to mind a shopping trip years ago where my friend and I stared in equal parts horror and wonder at a woman’s dangling, long bean-like fingernails. This is precisely why I’ve walked passed them many times in Asian groceries and given them strange looks at Twin Cities farmers markets.

This all changed the following summer when I noticed the little boy I nannied chewing on a long bean his mother gave him as a snack. Long beans were one of his favorite snacks and he seemed content using his two and only teeth to nibble the wrinkly, green strands. Suddenly, they seemed less menacing.

Now, long beans are one of my favorite vegetables. They look more unusual than they taste and I actually prefer their sweet flavor and crunchy texture to standard green beans. If you are looking to add a new vegetable to your repertoire, try this simple preparation.

Chinese long beans

Be careful when adding the sauces to a smoking hot pan. I learned the glaze can burn when I scorched my first batch.

Ingredients:
Long Beans, cut into bit sized pieces (about two cups)
Vegetable oil (not olive)
Eggs, scrambled
Onion, diced or cut into half moons
Salt
Black Pepper
Soy Sauce
Sugar
Optional: Sesame seeds to garnish

Instructions:

  1. Wash the long beans, trim off the ends, and cut into manageable pieces.
  2. Cook scrambled eggs in a little bit of oil and set aside. Cut into strips or break into small pieces. If you plan to use the same pan to cook the beans, rinse or wipe out the pan when it’s cool enough to safely handle.
  3. In a hot pan, stir fry the onion in a little oil (not olive oil).
  4. Before the onions brown, add the green beans and stir fry until they are tender. If the outsides of the beans slightly blister, they will taste even better. Make sure the onion does not burn.
  5. Turn off the heat and remove the pan from the burner. If the pan is scorching hot, let it cool slightly so that the glaze does not burn.
  6. Toss the beans with soy sauce or miso mixed with a little it of water, plus a sprinkle of sugar or drizzle of honey for a salty-sweet glaze. Taste as you go and adjust the soy and sugar as needed.
  7. You could also add hot pepper, garlic, or sesame seeds.

Recipe: Vegetable Strudel With Creamy Mustard Dip

It’s Vegetablestrudeltime.

I like this strudel so much, I ate it for dinner, breakfast and lunch.

There’s something special about foods all wrapped up in pastry, whether they are meat pies or vegetable pies. Earlier this winter, I worked briefly in the kitchen of a restaurant before I accepted my current role. The chef made a vegetable strudel for a fancy event and sent the staff home with the leftovers. As people who have worked in a restaurant often know, just because you work around food doesn’t mean you have time to eat it! When I got home late that night, I kicked off my grease-covered shoes, removed my hairband soaked in dishwasher spray and shared my little piece of vegetable strudel with Jake. It was memorably delicious.

When I was flipping through Baking: A Commonsense Guide, a cool Australian cookbook, the recipe for Vegetable Strudel caught my eye. The filling in this strudel contains eggplant and tastes more like caponata. In hindsight, a little splash of balsamic or red wine vinegar would add a lovely tang. Even though this recipe has a lot of instructions, this strudel is easier to make than it might seem. Adjust the vegetable filling however you’d like and don’t worry if the sheets of fillo rip or stick together. Simply fuse them together with butter.

Strudel

Vegetable Strudel Rolls
Adapted from the recipe for Vegetable Strudel in Baking: A Commonsense Guide.

Cooks Notes: I found a box of Athens brand phyllo dough at Target in the refrigerated section for a few dollars. The box contains two rolls of sheets. Larger purple eggplants may have a bitter note. Supposedly, you can remove some of the bitterness by sprinkling the eggplant with salt and patting the slices dry when they release moisture. The slimmer Japanese eggplants have a thinner skin and sweeter flavor, making this step unnecessary. The strudel is crispiest eaten hot from the oven. As it cools, the fillo will get softer. This might bother some, but we’ve been digging into the strudel anyway. Reduce the filling by half if you’d like to make less strudels. We like lots of leftovers. 

Veg strudel inside

Ingredients:
Olive oil
1 small onion, diced
2 bell peppers, de-seeded and cut into small strips.
2 small zucchini (or one large), sliced into half moons
1 small/medium eggplant, partially skinned and cubed, or two Japanese eggplants.
2 handfuls fresh spinach leaves
Basil, I used two sprinkles of dried
Salt
Black pepper
Pinch sugar
1 package fillo dough
Melted butter, start with 1/2 stick
5 oz (or more) of shredded sharp cheddar (or your favorite cheese)
Sesame seeds

Dip:
Mayo
Dijon mustard
Vinegar (or lemon juice)
Worcestershire sauce
1 clove garlic, grated
Sugar, a pinch
Hot sauce

Instructions:

  1. Pre-heat oven to 400℉
  2. To prepare eggplant: If your eggplant is large and has thick skin, remove some of the skin. Cut into thick slices. Sprinkle with salt. Place on paper towels until some of the moisture releases from the eggplant. Absorb moisture in towels and cut slices into small cubes.
  3. Pre-heat a large pan over medium heat. Saute onion in a couple of tablespoons of olive oil until it begins to turn brown. Season with salt and pepper.
  4. Add the bell pepper, zucchini and eggplant. Season with salt and pepper. Saute until tender, adding more olive oil as needed. If you have too many vegetables for the pan, split them between two. You don’t want the vegetables to get too soft because they will bake in the oven for another 30 minutes. HOwever, you do want them to cook down enough to release a lot of their moisture so the strudel isn’t mushy.
  5. Toss in the spinach and toss mixture until the spinach wilts.
  6. Taste the vegetable mixture for seasoning, adding more salt or pepper as necessary. Toss in some fresh or dried basil and a pinch of sugar. Remove from heat and set aside to cool.
  7. Carefully unpack one roll of fillo dough. Remove one sheet. Gently brush with melted butter and top with another sheet of fillo until you have six layers. *Cover the fillo you are not working with, with a damp towel so it don’t dry out and become brittle.
  8. If your fillo keeps ripping: Depending on your box of fillo, some of the sheets may be hard to separate or stick together. If they are all broken, layer the partial pieces together as you brush with melted butter. Once you stack six layers of sheets, they will be strong enough to roll around the filling.
  9. When you have your six layers of fillo, carefully place filling along one of the long edges, leaving space on all three edges. Sprinkle with cheese. Roll the fillo around the filling, tucking in the edges.
  10. Place on a sheet pan lined with parchment paper seam-side down. Brush with more melted butter and sprinkle with sesame seeds. Repeat process with remaining vegetable mix and strudel.
  11. Bake for about 30 minutes or until the pastry is golden brown. If the edges brown too quickly, lightly cover them with foil.
  12. To prepare the dip, combine the ingredients, adding more or less of each according to your taste.

My Readers Teach Me How To Make The Best Salsa: Their Tips & My Take

I’m notoriously bad at growing things.

During my first couple years after college, I worked at a church and inherited an office full of Peace Lilies. Try as I might, I couldn’t keep them alive and so all the plants were confiscated from my office never to return. And then there was the container plant garden disaster on my Fargo balcony in 2012. . .

I’ll try again when we aren’t living in a town home development, but, for now, I’ll happily accept any of your extra produce. My in-laws cultivate a beautiful garden of fruits and vegetables in the backyard of their East St. Paul home. After our last visit, they sent us back home to Iowa with a sack full of salsa veggies and burstingly-ripe tomatoes.

I’ve prepared pico de gallo before, but wanted some new ideas for making salsa-making, so I sought the advice of my readers and friends. Here’s what they had to say:

  • Ally of Ally’s Sweet & Savory Eats: Ally makes salsa once a week. She recommends blending eight tomatoes, one onion, one jalapeno with seeds, one clove garlic, a handful of cilantro, salt, pepper, cumin, and the juice of one lime (cutting up the larger vegetables). Check out her recipe for “Copy Cat Chili’s Salsa.
  • Jenny of Prairie Californian: Jenny roasts her salsa veggies at 400℉ and zips them in a food processor with salt, pepper, sugar, cilantro, oregano, and lime juice.
  • Kate of Kate in the Kitchen: Kate broils her salsa veggies until charred and blends in a food processor. She seasons her salsa with cumin, smoked paprika, ancho chili and kosher salt to taste.
  • Sara (my cousin-in-law married to Brian Dahlen): Sara transforms these salsa vegetables into homemade enchilada sauce by roasting and blending them.

Salsa Collage

As always, their advice was spot-on. We love our golden, roasted salsa and practically eat it like gazpacho. It tasted especially refreshing accompanying simple cheese and spaghetti squash quesadillas.

My Take: 

  1. Cut tomatoes and peppers in half. Cut onion in quarters.
  2. Arrange in a single layer on a sheet pan along with a few cloves of garlic still in the skin. Drizzle with olive oil and season with salt.
  3. Broil until softened and blistered. Flip one-two times for even blistering.
  4. Peel the roasted garlic and zip everything in a blender or food processor with a lime juice and a handful of cilantro until chunky with a drizzle of olive oil.
  5. Season with red wine vinegar, thinly sliced green onion, oregano, salt, sugar, black pepper, and cumin.
  6. My salsa needed more of a kick so I blended-in an additional clove of raw garlic.

I’m Smitten With Smitten With Squash: Layered Greek Tzatziki Dip

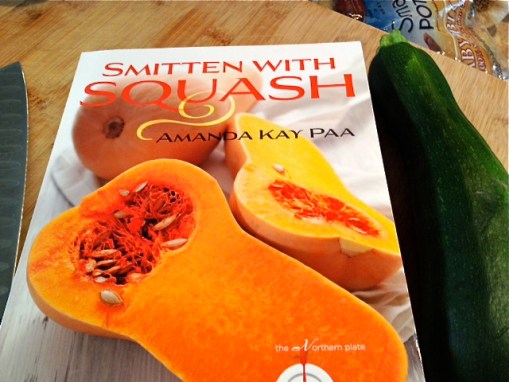
I’m smitten with Smitten With Squash, Amanda Paa’s new cookbook. She’s a Twin Cities resident who also blogs beautiful recipes at Heartbeet Kitchen.

Just as the book’s description says, Smitten With Squash is truly a celebration of this diverse and under-appreciated vegetable.

It seems that Midwesterners get inundated with zucchini and yellow squash in the summer and winter squash ranging from acorn to delicata in the fall right up ’till the winter. I almost can’t get enough squash and appreciate how this cookbook offers over seventy ways to prepare squash for breakfast, lunch, dinner and even dessert. It’s probably the best available cure for those suffering from squash fatigue.

Squash

For those who are allergic to gluten, each recipe can be prepared gluten-free if desired. Amanda shares her favorite gluten-free flour substitute so everyone can make her baked goods like Sweet Delicata Pie With Pecan Praline (p. 125) and Chocolate Coconut Zucchini Bread (p. 62). My good friend introduced me to chocolate zucchini cake and I’m excited to try Amanda’s version.

Amanda has graciously given me permission to share one of her cookbook’s recipes here on Jeni Eats. It was hard to choose my first recipe, but I decided to prepare her Layered Greek Tzatziki Dip (p. 18) with a beautiful North Iowan zucchini I bought at my local Mason City farmers market.

This dip is so refreshing because it’s perfectly fresh with seasonal vegetables, herby with dill, basil, and parsley, and it strikes an addicting balance with lemon-flecked greek yogurt and garlicky marinated vegetables.

Jake and I are storing the yogurt and vegetable mixtures in separate containers and layering them upon serving, since it’s just for the two of us. Amanda notes that one can use a combination of any herbs and prepare the dip a day ahead.

Layered Greek Tzatziki Dip
From Smitten With Squash by Amanda Kay Paa. Serves 8-10 as an appetizer. 

DSC_0129

Marinated Vegetables
1 cup finely chopped zucchini
1 cup finely chopped cucumber
1/2 cup chopped canned artichokes
1 1/2 cups chopped cherry tomatoes
1/4 cup pitted chopped kalamata olives
2 tablespoons olive oil
2 cloves garlic, minced
2 tablespoons chopped fresh basil
1/4 teaspoon kosher salt
1/4 teaspoon black pepper

Dip
Zest & juice of 1 lemon
16 ounces light sour cream
1/2 cup Greek yogurt
1/4 cup chopped fresh parsley
1/4 cup chopped fresh dill
2 cloves garlic, minced
1/2 teaspoon kosher salt
1/4 teaspoon black pepper

Toasted pita wedges or tortilla chips for serving (I made a batch of Smitten Kitchen’s pita bread and toasted my own wedges in a 400℉ oven with olive oil, salt and pepper until golden brown).

Instructions
Mix together all of the marinated vegetable ingredients and allow them to sit for at least one hour. The flavors will develop the longer they mingle.

When you are ready to assemble the dip, drain off any extra liquid from the vegetables. Set aside 1/4 cup of the vegetables. If you are preparing the dip for a party, layer the yogurt and vegetables in a clear, round serving bowl, starting with the vegetables. Finish by topping the last yogurt layer with the reserved 1/4 cup vegetables in a circular mound.

You can also mix the vegetable and yogurt mixtures together, or layer them as individual portions if you are not serving a group.

« Older posts

© 2024 Jeni Eats

Theme by Anders NorenUp ↑

Twitter
Visit Us
Follow Me
INSTAGRAM